In recent years, I’ve tried several NAS systems: Synology, QNAP, NextCloud, and OpenMediaVault. I can only advise against Synology and QNAP; you pay a lot of money for a more or less nice enclosure, but the underlying software is outdated, and the performance compared to open-source alternatives is subpar.
Two open-source alternatives are NextCloud and OpenMediaVault. They have a major disadvantage: you can’t buy them with hardware. The software is available for free online, but you have to source the hardware yourself. This is, of course, a hurdle. I’ve had very good experiences with NextCloudPi. It’s like a local Dropbox at home for very little money. However, strictly speaking, NextCloud is not a NAS but just cloud software. Setting up a shared folder that you can mount as a drive involves a bit more effort. But it does offer software that you can install on your phone and computer to sync part of your hard drive.
OpenMediaVault offers exactly that: a hard drive on your own network, but lacks what NextCloud offers. There’s no software for mobile or desktop, drives must be manually mounted, and nothing gets synchronized. OpenMediaVault requires Debian, whereas NextCloud is more flexible. However, OpenMediaVault isn’t particularly resource-hungry. I haven’t yet been able to stress my installation on the Raspberry Pi 4 with 2GB. Outside the network, you can only access your files via VPN, which is not included and must be installed either through the router or another system. OpenMediaVault is compatible with Apple TimeMachine!
To summarize, I would describe it like this:
Avoid buying systems as much as possible and save a lot of money.
NextCloud is great if you want an alternative to a cloud service.
OpenMediaVault is good if you need shared drives.
For both systems, NextCloud and OpenMediaVault, you still need some other system to back up your data. Yes, you may have your data stored locally on a second medium, but if your house burns down, you have a problem.
In the Digital Analytics course, one of the first tasks is to create a log file where you document who has already tracked you today, where the data is now, and how long it will be stored. While this exercise raises awareness, it doesn’t provide any guidance on how to protect yourself from any kind of tracking. This article aims to do just that.
The term “Digital Self-Defense” is not mine, but comes from digitalcourage, a nonprofit organization that primarily advocates for data protection and civil rights (disclaimer: I am a supporting member). Digitalcourage offers an entire section on their website dedicated to the topic of Digital Self-Defense, and I particularly recommend the Self-Defense for the Busy guide.
Some of the tips are challenging. Anyone who has tried MetaGer knows what I mean 🙂 It’s a balancing act between convenience and privacy because more privacy often means you can’t always use the most convenient tools. However, it is possible to use Google without giving away all your data. Here are some additional tips:
First, I always recommend using a VPN (Virtual Private Network). A VPN “tunnels” the communication between your computer and a point on the internet, so no one can intercept it. In a public Wi-Fi network, using a VPN is absolutely essential, as it’s very easy for someone to eavesdrop on your communication. At home, a VPN prevents your Internet Service Provider from recording your communication. However, you must be cautious when choosing a VPN provider, as they could also log your communications. Additionally, using a VPN doesn’t necessarily speed up your internet, but if it’s a fast VPN, you won’t notice the difference. For best results, install the VPN not just on your computer, but also on your phone and other devices. And don’t forget to check out DNS service recommendations.
Gmail is still my favorite email service, but I no longer use it. Unfortunately, the commonly recommended services like Posteo or mailbox.org are not ideal in terms of UX/UI. I think ProtonMail is good, although they’re not on the list of recommended email services from digitalcourage. Also, ProtonMail is quite expensive, but it offers encrypted mailboxes, so even ProtonMail’s operators cannot access my emails.
Using Firefox as your browser is always a good idea, and Brave offers some additional privacy settings.
It’s essential to use different passwords for every site, and a password manager is a must.
Try not to stay logged in everywhere. And if possible, avoid profiling like in the Google Ad Settings.
Incognito or private browsing modes in browsers don’t help much. Google Analytics, for example, still tracks you. And the server on the other end logs everything anyway. So, you should always use a VPN.
When it comes to cloud storage, I am a big fan of NextCloud. It works just as well as Dropbox and even has some additional features. The only reason I stopped using it is because it didn’t always work flawlessly, partly because I tinkered with it myself. I currently use iCloud, which is not recommended, as the data still resides on another server. However, I trust Apple’s claim that my data is only readable by me, as it’s encrypted on their server. Here, I’m trading convenience for absolute security. With Dropbox, on the other hand, data is stored unencrypted. I would still recommend NextCloud, as digitalcourage does, but I’d suggest using a provider rather than self-hosting everything.
For messaging apps, Signal is really the only option. Telegram is not, nor is Threema, and definitely not WhatsApp. For DNS, only 1.1.1.1 is an option. Every time you enter a URL in the browser, it needs to be translated into an IP address. This translation is done by DNS. Normally, your Internet Service Provider (Telekom, Vodafone, etc.) forwards this request to their own DNS service. But you can use 1.1.1.1 instead 🙂 They don’t log anything.
If you want to know exactly what the software on your computer is doing and whether it’s sending data home, you should only use open-source software, like Linux. This can be a big hurdle, but Ubuntu is also user-friendly and more stable than Windows, for example.
Discount cards like the Payback card should not be in any wallet. Most of the time, the products you can get with the points are cheaper elsewhere. This doesn’t include non-personalized punch cards (“The 10th coffee is on the house!”).
And for anyone still wondering why they should do all this, please watch the following video:
After removing the Raspberry Pi 4 from my kids’ Phoniebox and replacing it with a less power-hungry Raspberry Pi 3, I was looking for my next project. I’ve since moved away from NextCloudPi, as managing it with the iPad/iPhone/Mac was just too cumbersome. However, I’ve been wanting to replace the QNAP for a long time, and I’ve always wanted to try OpenMediaVault as a file server, including for TimeMachine backups.
The QNAP Mispurchase
What bothers me about the QNAP? I had bought the TS-431X2 for over €500, and it has a Quad-Core AnnapurnaLabs Alpine AL-314 1.7 GHz processor. Using Docker on it is not enjoyable, which was actually one of the reasons I bought the QNAP NAS. Unfortunately, the QNAP wasn’t much faster than the Synology I had before. But the worst part was the outdated libraries, especially with regard to the web server. You can install NextCloud with a lot of workarounds, but it’s far from user-friendly, and the support was not very helpful. And then there were constant error messages or warnings popping up.
In addition, setting up shared folders and so on is also quite complicated. I just got frustrated with the thing.
Is OpenMediaVault Better?
First of all, it’s different. OpenMediaVault is NAS software, but unlike QNAP or NextCloud, it doesn’t offer desktop syncing. You can’t buy ready-made hardware, plug it in, and have it work. It’s certainly not suitable for average users, but they probably wouldn’t buy a NAS from QNAP anyway 🙂
If you know a little about Linux, the installation is relatively simple:
Flash Raspbian Buster Lite (or whatever comes next) onto a microSD card. Raspberry Pi provides an installer for Mac and PC. Just make sure to choose the Lite version, not the standard Raspbian.
Copy an empty file named ssh to the boot volume so you can log in via the terminal (assuming you have an Ethernet connection).
Insert the card and start the Raspberry Pi.
Then find the IP address of the Raspberry Pi and log in with:
My 1TB SSD was immediately recognized, but it had to be formatted and then mounted.
First Problems
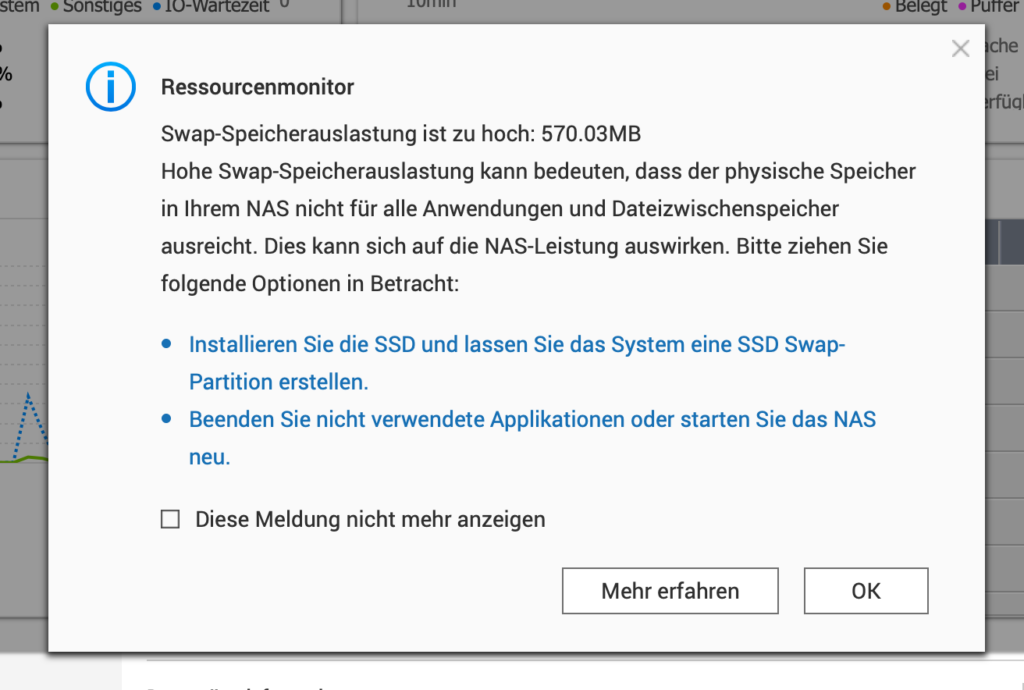
Unfortunately, that was the end of the easy steps. For example, Sonos wouldn’t connect to OpenMediaVault. The trick is that you need to change the SMB configuration. This can be done in the interface. I was also a bit shocked at first by the following error message:
It couldn’t get much more dramatic. At first, I thought I had encountered a kernel panic. However, the error message only indicated that the session had expired.
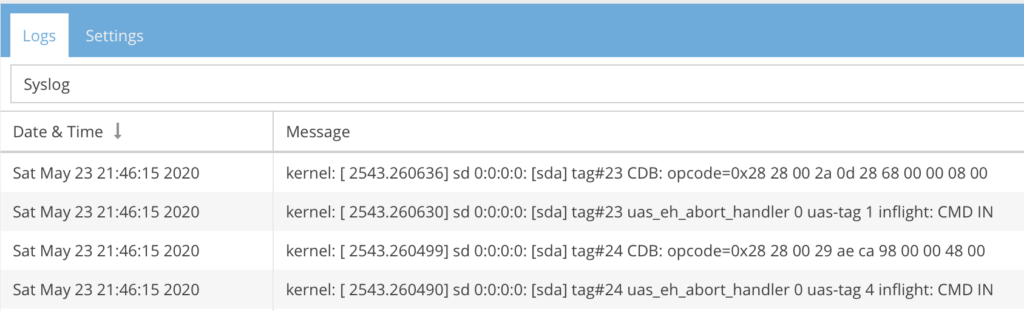
Then came network connection drops, adding to the initial problems. And these were serious. My SanDisk 1TB Ultra SSD is brand new, but apparently, the Raspberry Pi 4 doesn’t like the adapter:
UAS_EH_ABORT_HANDLER is an error message you don’t often see. A bit of research shed some light on the issue. By the way, the change in /boot/cmdline.txt should actually be at the beginning of the line and not create a new line. If you do it the wrong way, the Raspberry Pi won’t boot anymore—I’ve already tried that for you 🙂
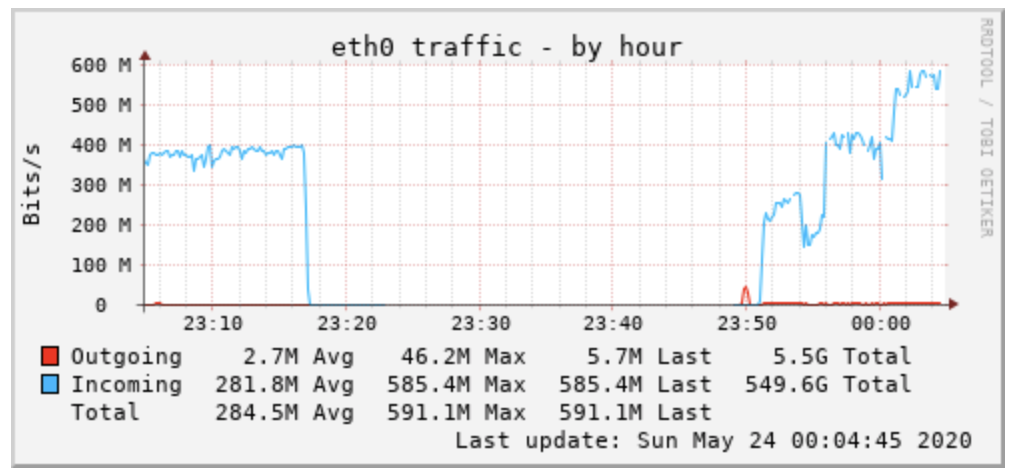
As slow as it was expected to be, the connection is not that bad now despite the quirk:
Just under 600 Mbps is something I’ve rarely seen, of course, this was measured on the Ethernet adapter, so it might not be as fast when writing to disk. But at least I haven’t had any network dropouts so far. What stands out is that the RAM is used much less than with the QNAP. And on the Raspberry Pi, I can even run R 🙂
Conclusion
Unfortunately, there is still no suitable case for my intended project. I’d like to fit the Raspberry Pi plus 2 SSDs into a case. That would obviously be a good excuse to finally buy a 3D printer, but honestly, I don’t have time for another hobby.
Overall, this setup with the Raspberry Pi and OpenMediaVault makes a good impression. For a fraction of the cost (under €100), you get more performance than with the expensive QNAPs or Synologys of the world.
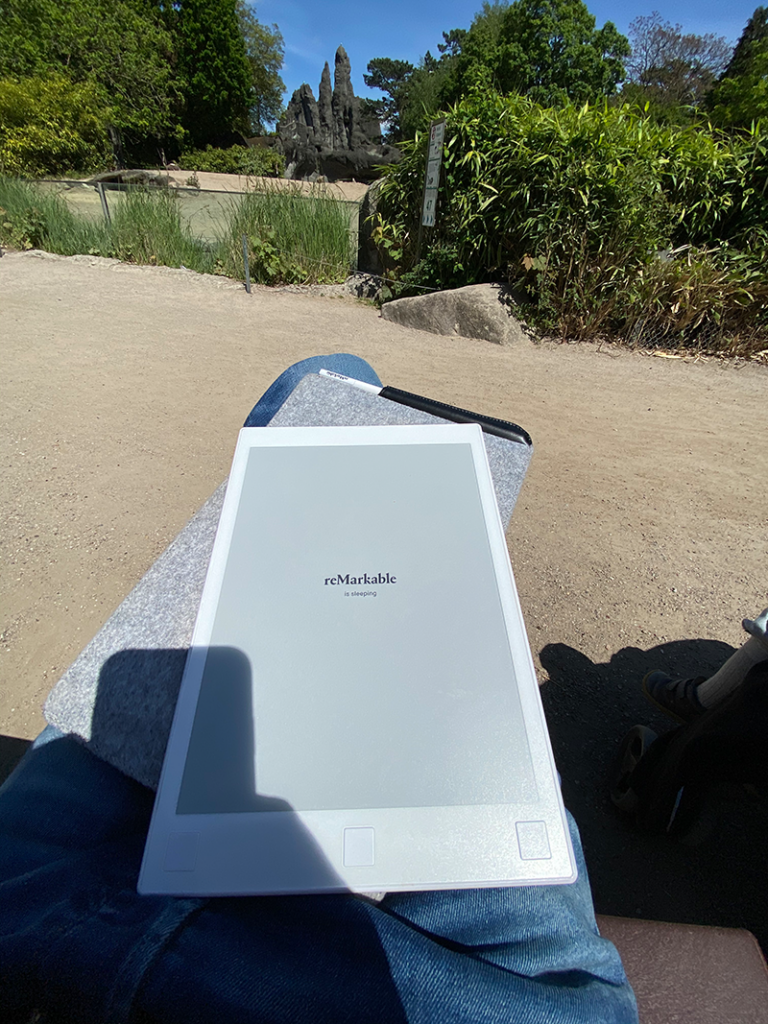
First of all, it doesn’t make much sense. And for many people, it really doesn’t make sense to buy a reMarkable tablet when they could just have an iPad and use its features. The reMarkable tablet is expensive—not as much as an iPad Pro, but in comparison to the features of an iPad in the same price range, the reMarkable looks extremely poor. Yet, despite all this, I’ve come to appreciate the reMarkable in the few days I’ve owned it. The version 1, which I snagged for under €300 on eBay, will likely drop in price soon since the second generation is already being advertised. But before I spend €500 on a device I’m not sure will really suit me, I’d rather use a second-hand one to test the concept. Because with the reMarkable, you can only read and annotate PDFs/eBooks and create notes and sketches. No emails, no web browsing, nothing. Black and white. E-Ink display. Writing with the pen feels almost like writing on paper. You don’t need to charge the pen, but you do need to replace the nibs occasionally. And the device costs anywhere from €450 to €600 depending on the accessories.
What’s my use case? I had bought an iPad Pro with the pencil and everything to work and read with less luggage, anywhere. Reading and writing are, alongside programming, communication, and creating PowerPoints, my main activities. I have to read a lot, especially academic papers, but also articles from journals, etc. Additionally, I write a lot. The split-screen feature on the iPad was a killer app for me: PDF on the left, my notes on the right. It often worked well. But not always. However, the Apple ecosystem with iCloud allows me to keep all my files synchronized across all my devices.
But even then, it’s not perfect. Sometimes, I find it hard to focus because, as often happens when you try to focus on something, you get distracted by reminders of things you absolutely need to do and write down. Then you see those reminders and realize you forgot something urgent, etc. The iPad enables all of this with one device. And so, you quickly get distracted, especially when trying to work on something difficult. The temptation to quickly check emails is very strong. With the reMarkable, this doesn’t happen. And that limitation is what you pay for, at a steep price. Apps that restrict you or help you focus better were something I looked into and used over 10 years ago.
Do I generally have a problem with concentration? No. But it might be the medium. I wrote my most successful book (3 editions) almost entirely on paper, as incredible as that sounds. In a notebook on a terrace in a bay in Sardinia. I had no computer with me, just my thoughts. I wrote them down, crossed them out, rephrased them, etc. Later, at home on my computer, I added screenshots and other materials. Just me and the paper. I’m not sure I could do that today with an iPad. Because even though almost all my notifications are turned off, my brain knows that something new could pop up, and our brains crave that. The Organized Mind by Daniel Levitin describes how every interruption stimulates our brain, preventing us from focusing, because thinking is exhausting. I was particularly impressed by Sting’s preference for having the same room set up wherever he is in the world, so that nothing new could distract him.
Tranquility is the new luxury of our society. (The 5 AM Club, Robin Sharma)
This quiet is undoubtedly a luxury when you pay so much for a device with fewer features, just to have peace and be able to focus. Perhaps my preference for paper comes from my socialization: I grew up with paper, wrote everything on paper—my final exams, my university exams, etc. Writing books on a computer, at least exclusively on a computer, is a torture for me. I have to have my…
But the iPad has other drawbacks. If I want to read outside with the iPad, it’s better if the sun isn’t shining. With the reMarkable, that’s not a problem. The iPad doesn’t handle that as well. Besides, the device is quite heavy (653 grams “naked” with the pencil / 1060 grams with the case including the keyboard). It’s not really suited for prolonged reading or holding in your hand. The reMarkable weighs 362 grams “naked” with the pencil / 505 grams with the case, though that’s a bit unfair since the cases are very different. For the reasons mentioned, I don’t like taking the iPad with me when I go outside for a bit. It’s not only heavy and unwieldy, but I’ve also had the experience of how quickly the glass can break (and how expensive the replacement is).
And what the iPad lacks in light during the day in the sun, it has too much of in the evening. I notice it when I’ve been staring at the screen for too long in the evening. The iPad isn’t suitable for me for extended reading and writing of academic texts, partly for ergonomic reasons, but also due to occasional lack of discipline. Following the 5 A.M. Club philosophy, electronic devices really shouldn’t be used in the evening, and the reMarkable helps with that, if you turn a blind eye.
However, the reMarkable has some shortcomings that are rather unacceptable for the price:
The Wi-Fi module seems quite weak; in my office, it shows only 1 out of 3 bars, while all my other devices have at least 2 out of 3.
The battery lasts about 2-3 days with moderate use, which isn’t much for an e-Ink display. Charging takes forever.
Large PDFs (such as Springer non-fiction books between 3 and 30 MB) are a real burden for the reMarkable tablet, and it can take a while to flip from one page to the next. Especially with large PDFs, the reMarkable often freezes or crashes.
The reMarkable can’t open password-protected PDFs at all. That’s quite suboptimal.
The search function is a joke. You can either search for book titles, but only within the book you’re currently viewing. You also can’t directly jump to the location from the search result—you have to remember the page number and then awkwardly navigate through multiple steps to get to the page.
The plastic feels cheap and sometimes a bit dirty, even when it’s clean. For the price, that’s really not acceptable.
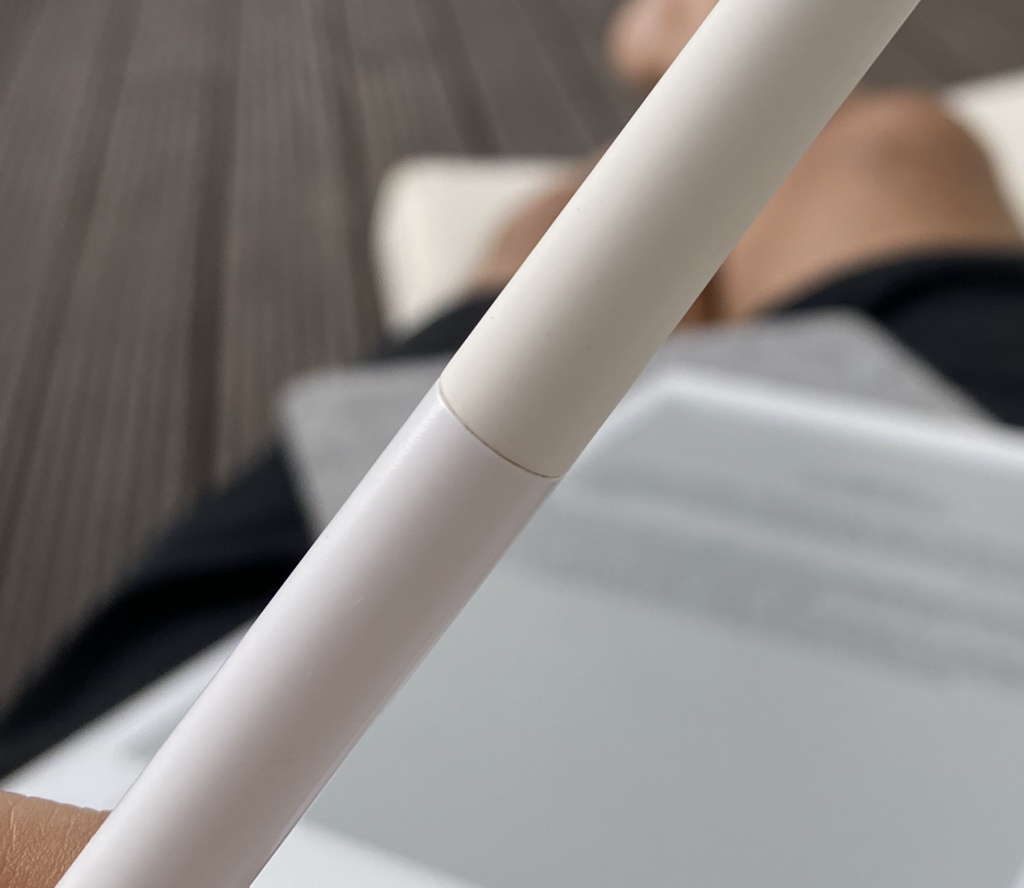
The pen seems to have two different types of plastic, at least there’s a noticeable difference in the whites:
What I also don’t like is the lock-in. I’m trapped in their cloud—what if they go bankrupt? I’ve asked myself that several times with tado, but at least you can supposedly still operate the thermostats manually (though they’re still way too expensive). With the reMarkable, you’d be lost if the cloud were shut down. It’s likely that, eventually, you’ll have to pay a subscription, just like tado switched to. However, what helps a bit is that supposedly, you can also access your documents via USB. I haven’t tried this yet, but it means I could potentially build an application like my Kindle Clippings Manager, which syncs a folder on my computer with the reMarkable’s storage. That would be better than this double organization.
Overall, the device is hopelessly overpriced for its technical features, quality, and software. But still, I like it. It serves my use case better than the iPad, and unlike the Moleskine, it’s not a first-class idea graveyard. It has proven this very well in the few weeks I’ve had it so far.
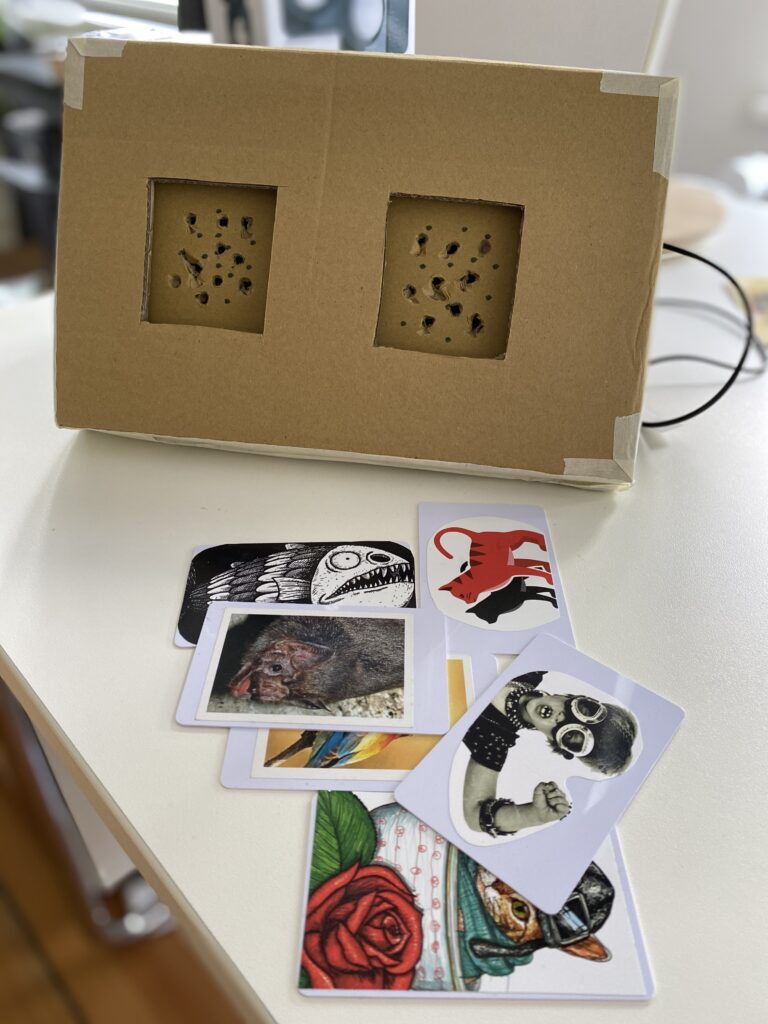
Preliminary: The first Phoniebox, my MVP (Minimum Viable Product) in a cardboard box, was an instant hit. The RFID cards, which were decorated and painted, are treated like the greatest treasure, sometimes even hidden or brought to the table. So, it’s time to turn the MVP into a proper box. If you haven’t read the first part about my MVP, the Phoniebox is an open-source alternative to the Toniebox that you can build yourself. The advantage is that you don’t have to buy expensive Tonies but can use cheap RFID cards or stickers to play your own selected music files.
I’m not particularly handy, and the question of how to make holes in the wooden box had me stumped. I didn’t want to just drill small holes again, especially since I wanted better speakers this time. And that’s how things escalated. This box ended up being considerably more expensive. What did I buy?
Total: approximately €200! The saw attachment can be used again, and handier people may already have such tools at home. But you should be aware that the Phoniebox can initially be much more expensive than the Toniebox. However, if you were to buy multiple Tonies for the Toniebox, and let’s just take the Creative Tonies at €11.99 each as an example, you’d be at the same price after 10 Tonies. From the 11th card onwards, the Phoniebox becomes cheaper. In terms of sound quality, my box is definitely in a different league than the small Toniebox.
Activating the MiniAmp wasn’t entirely straightforward. Olaf Splitt describes the necessary steps very well here. However, it seems I had already installed the Toniebox software, which unfortunately occupies some of the GPIO pins. These need to be disabled. What was confusing was that the Raspberry Pi detects the sound card, and you can adjust the volume, but unfortunately, no sound comes out. This made troubleshooting tricky. But the sound, combined with the speakers, is really great. I initially assembled the parts without the box just to check if everything works.
The EasyAcc power bank is one of the few that can provide enough power while also charging. This ensures uninterrupted music enjoyment. However, I haven’t had good experiences yet in terms of more power being pumped into the battery than is being used by the Raspberry Pi. Olaf Splitt doesn’t address this point clearly in his otherwise great guides. He even mentions weeks (!!) before needing to recharge the power bank. The big difference is probably that I’m using a Raspberry Pi 4, and it drains the EasyAcc power bank faster than it can recharge. The power bank can theoretically be charged with 5V 4A, but only if both USB ports are used for charging. Otherwise, it remains at 5V 2.4A. The Raspberry Pi 4 is typically powered with a 5V 3A power supply, but it should also run with 5V 2.5A, depending on the peripherals connected. In my case, that’s the MiniAmp and the USB card reader. I may end up replacing the Raspberry Pi 4 with a Raspberry Pi 3.
Here’s the final result, though the video doesn’t quite reflect the actual, really good sound quality.
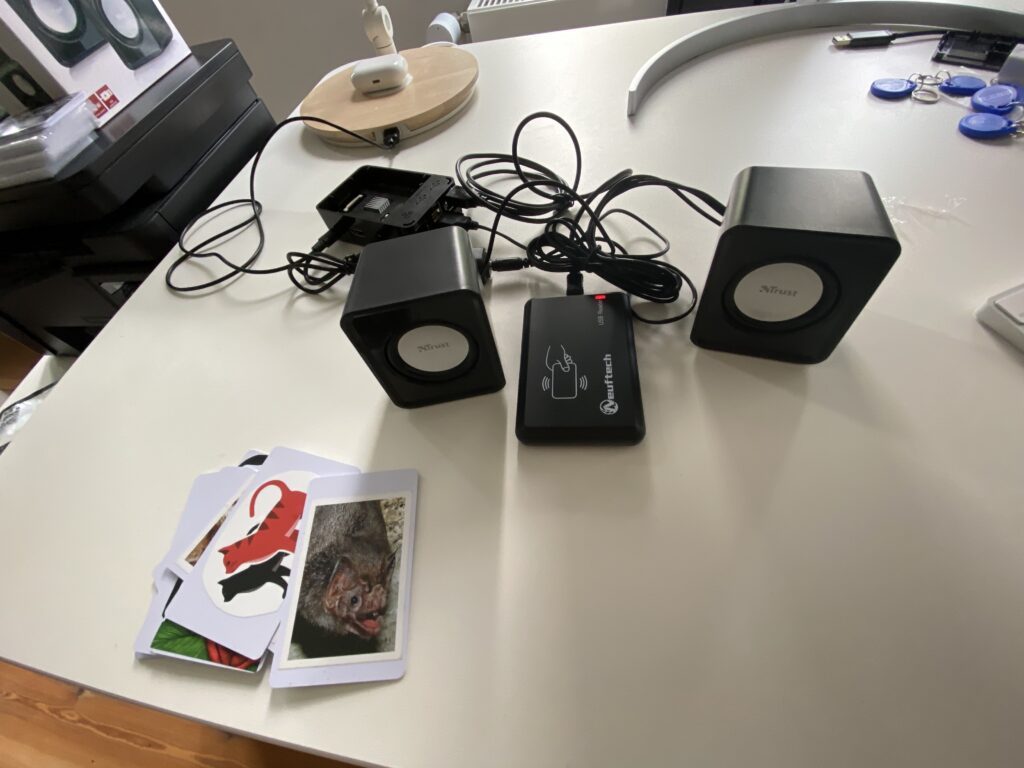
This is what the inside looks like:
Other DIYers had removed the card reader from its plastic casing and glued it directly inside. However, it works well like this too, as the box wall isn’t so thick that the card signal wouldn’t work. An additional Wi-Fi antenna wasn’t necessary either, but our apartment’s Wi-Fi signal is also very strong.
I haven’t installed the USB port yet. In the next step, I also plan to add a power switch that will properly shut down the box before cutting off the power.
When I was a child, if there was one thing I loved, it was listening to records or cassettes for hours. Our kids also love music, and luckily, famous arias from The Magic Flute are a hit, but so are Kraftwerk’s The Robots or Herman van Veen’s quirky adventures. But how can we give toddlers access to “their” music in a world dominated by Spotify and Sonos?
A Toniebox wasn’t an option for us, even though its user interface is very child-friendly. Fortunately, there are open-source alternatives, and what’s even better, many of the components needed for this project I already had at home. One such project is the Arduino-based Tonuino, which has the big advantage of being very power-efficient and having an extremely quick boot time. The other project, which I replicated, is the Phoniebox, based on a Raspberry Pi 3. It has a longer boot time of more than a minute if the box is unplugged, and of course, it consumes more power. The big advantage for me here is that music can be managed via a web interface. Plus, I can easily turn the volume down when the kids get too excited 🙂
How does it work? On the SD card, folders are created in a specific directory, where music files or stream URLs are stored. The RFID cards are linked to these folders, so each card “triggers” the playback of the music in the respective folder. No data is saved on the card itself, and you can always reconfigure the card-linking. You can paint or sticker the cards so the kids have a reference for which music, audiobook, or stream corresponds to a card.
The shopping list on the Phoniebox site was a bit confusing and sometimes unsuitable. Here’s what I purchased:
A Raspberry Pi 3 (I had one already, cost me €39.99 back then, though now the Pi 4 is available for the same price. But the Pi 3 is more than sufficient if you can get one used!)
Total: €94.15. For comparison, a Toniebox costs €79.90. It comes with one Tonie, with additional pre-recorded Tonies priced at €14.99 and creative Tonies for €11.99. If I understand the concept correctly, you can load 90 minutes of content onto a Creative Tonie via the cloud, and while you can use them offline, the content is still managed online. With my 50 RFID cards, I essentially already have 50 Tonies, just without content. The content can be either something I already have (I had many of my old cassettes digitized because I couldn’t get them as CDs) or can be sourced cheaply. So, an RFID card can also be linked to a Spotify song, album, or even a radio station. Overall, it’s cheaper if you have more content, plus you’re independent from any platform. Building a box with Arduino would likely be much cheaper, and the battery would probably last much longer too.
The setup of the PhonieBox took me about 90 minutes:
Flash the Raspbian Buster image onto the SD card.
Pre-configure SSH and WiFi so I wouldn’t need a monitor or keyboard.
Assemble the components and connect the power.
Log in via SSH and start the installation with a one-liner.
The box is then ready to use!
Here’s what it looks like when initially assembled without a case:
Most of my time was spent loading the cards with content. You can either upload the audio files directly via SMB to the drive or through the web interface. However, not all MP3s were immediately recognized.
I hadn’t initially planned for a case, as I wanted to first check if I could even assemble the Phoniebox and if the kids could manage it. Therefore, the first version didn’t turn out very pretty, but hey, it’s a Minimum Viable Product 🙂
The box is loved dearly and sometimes even fiercely contested. So definitely a second box is needed.
At 2 1/2 years old, the kids don’t fully understand that multiple songs can be played with one card, and that the card needs to be placed back on the reader to move to the next track (if configured this way). So, I’ve set it up to restart the song from the beginning when the card is used.
It’s also a good idea to start with only a small selection of cards; otherwise, it can be overwhelming for the little ones. Our cards include:
“Zu Hilfe, zu Hilfe” from Die Zauberflöte
“Der Vogelfänger bin ich ja” from Die Zauberflöte
“Weg da” by Herman van Veen
“Das Lied der Schlümpfe” by Vader Abraham
“Die Roboter” by Kraftwerk
“The Young Person’s Guide to the Orchestra”
“Peter and the Wolf,” narrated by Loriot
One of the kids has hidden the card for the first track in the list—it’s his greatest treasure, which he barely lets go of.
I can’t recommend an Anker PowerBank, as it doesn’t charge while supplying power to the Raspberry Pi. Therefore, for version 0.2, I’ll switch to this model. This will make the device an additional 33€ more expensive.
My next version:
Will be built in a proper wooden box.
I will also upgrade to better speakers and use the HifiBerry MiniAmp.
I want to add a socket to the case for charging the battery.
I plan to avoid buttons for now; the more parts there are, the more that can break.
Finally, the two boxes should also be able to synchronize, and there is a guide by Olaf Splitt for that.
A general book on the basics of data analysis with R+; a big chunk, intended more as a general introduction. But I would always recommend Hadley’s book
As a general introduction to statistics, I recommend The Art of Statistics+ or Naked Statistics+, both very good and entertaining books (not only for statisticians)
For the 15th anniversary of this blog, there is not only a redesign, but also new technology under the hood:
Blogdown makes it possible to create a website based on Hugo with R. So I can design my blog with my favorite language and don’t have to think about how to get my R code or graphics in WordPress every time.
The output is pure HTML, which on the one hand abolishes the dependency on databases, WordPress plugins etc and on the other hand, and this is extremely important for me, enables super-fast delivery of content (see screenshot of the Google PageSpeed Insights below during the tests with my preview server). I don’t get any more mails because someone tried to break into my server, or because the database server requires too much memory.
The workflow is almost fully automatic: I write my texts in RStudio, commit a stand on GitHub, and from there it is automatically deployed to my web server. If I fail at something, I just go back to an earlier commit. Continuous deployment is probably what this is called in modern German.
In 2005 I had realized the first version of the blog with Movable Type. At that time, HTML pages were already being produced, which then no longer had to be generated in real time when a page was accessed. I don’t remember when and why I switched to WordPress. Maybe because there were more expansions there. For 10 years I was at least on WordPress and more than once enormously annoyed.
The switch to Hugo was not fully automated. The WordPress to Hugo Exporter was the only one of the popular options that worked halfway for me. It is necessary to have the space that a blog takes up today on the disk and in the DB free again on the disk, because everything is replicated on it as flat files. The error messages that the script spits out are not helpful in identifying this expected error. At the same time, not all pages were converted correctly, so I had to touch almost all pages again.
On the one hand, I noticed what has changed since 2005:
People and blogs that I miss, it feels like there are hardly any real blogs left,
Topics that either still interest me today or that I ask myself how they could have interested me at all,
and lots of links to external sites that are simply dead, even though the sites still exist.
The web is just as little static as we are, and the 15 years are a nice documentation of my different stages for me.
On the occasion of the anniversary of the website Boosting (60th edition!), here is a deep dive on how to create a custom report on the texts read to the end. This is a supplement to my four-part series “Web Analytics: How Data Leads to Action”, in the 60th issue you will find the 3rd part. Basically, I had already written about the topic here in comparison to the scroll depth. This is an example of how custom and calculated metrics can be used.
The screenshot states per page:
How many words a text has
How many times a page has been viewed
The proportion of views that led to an exit
The number of visibility of the YARPP element (YARPP stands for Yet Another Related Posts Plugin), which displays similar articles at the end of an article. If this element is visible on the user’s screen, it is assumed that the article above the element has been completed)
The percentage of visibility of the YARPP element with respect to all page views
The number of clicks on a YARPP link
The percentage of clicks on a YARPP link in relation to the visibility of the element
What problem does this report solve?
If a text is read to the end less often than other texts, then this text does not seem to be written in such an interesting way.
The length of the text could be a predictor of whether a text is read to the end; but if a shorter text is not read to the end, this could be an even stronger signal that the text is in need of optimization.
If the links to similar articles are not clicked on even though they are visible, they do not seem to be relevant.
Create the custom dimension and metrics
In Analytics, go to Administration (bottom left) and then click Custom Definitions in the Property column.
Click on Custom Metrics and then click on the red New Custom Metrics button
Choose an understandable name (e.g. “YARPP Lakes”)
The Scope is Hit
The formatting type is integer
The remaining values can be left blank
Click Save.
Repeat the process once again, this time for the “YARPP Clicks”. The settings are the same.
The first entry should now have an index value of 1, and the second entry should have an index value of 2, unless user-defined variables have already been defined.
If the number of words in a text is also recorded, a user-defined dimension is required. The process is similar, here again select a suitable name and the scope hit. Again, the index value for this custom dimension needs to be remembered or noted, as it will be used later in Google Tag Manager.
Implementation in Google Tag Manager
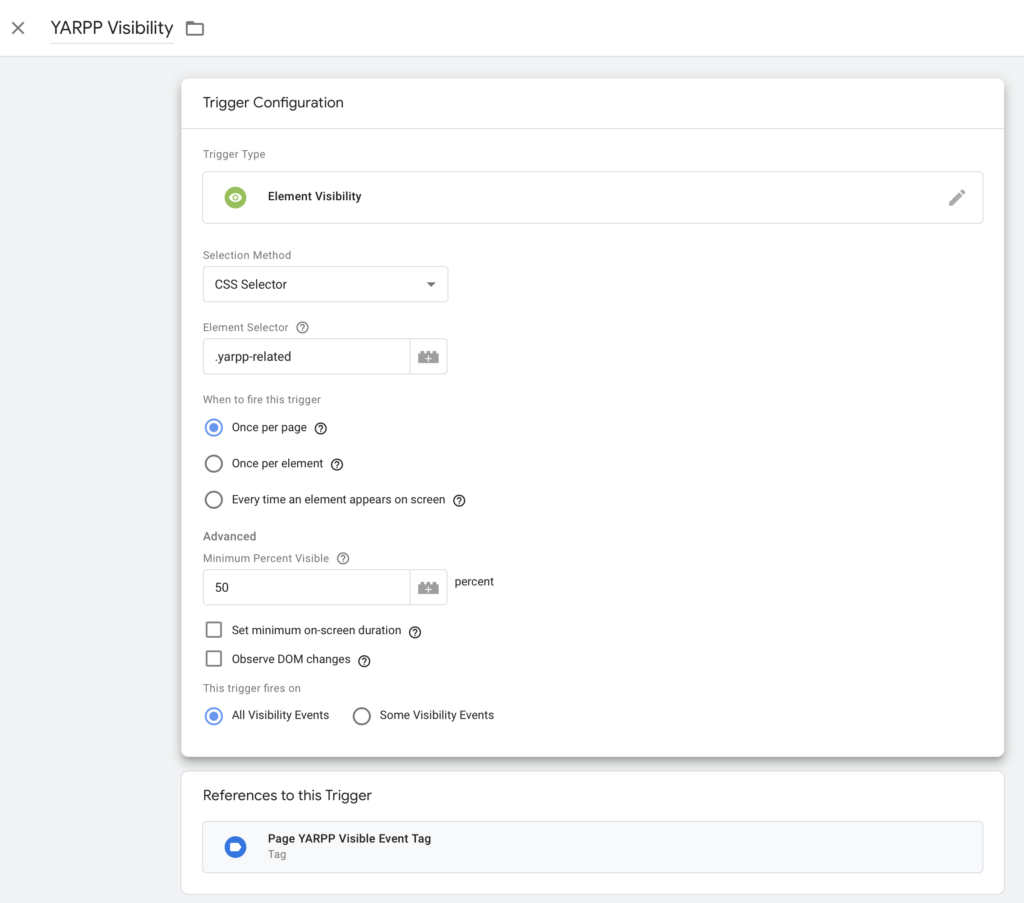
Once the user-defined definitions and measured values have been implemented, values can now be written to these variables. This is done with the Tag Manager. First of all, the element must be selected on the page where the trigger of visibility should be triggered. The necessary steps for this are already described in this article. Then the following trigger is configured:
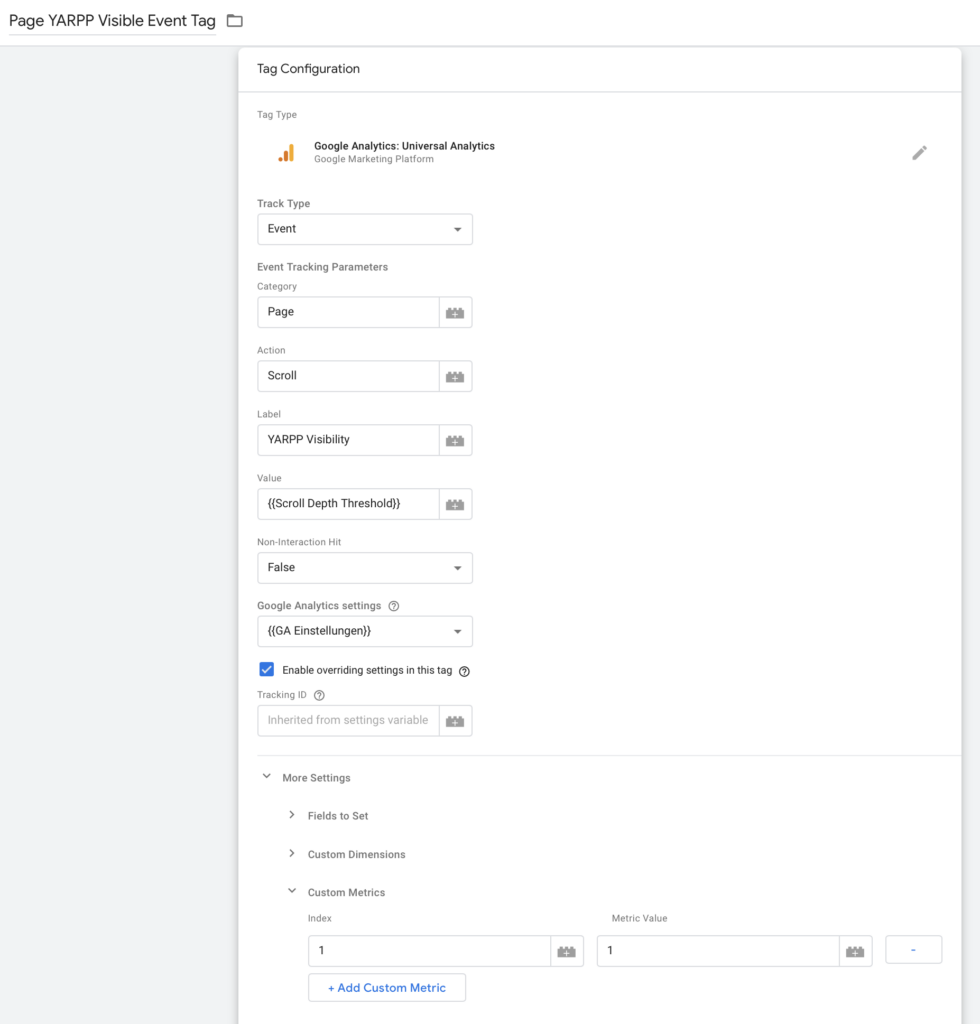
The trigger fires a tag, which now also has to be configured:
It is important in this step that the settings are overwritten, as this is the only way to pass a metric as a custom metric (Custom Metrics in the screenshot). Here you have to choose the index value that was defined by Analytics in the step above. The value of the measured value is 1 here, because for each sighting the counter jumps up by 1.
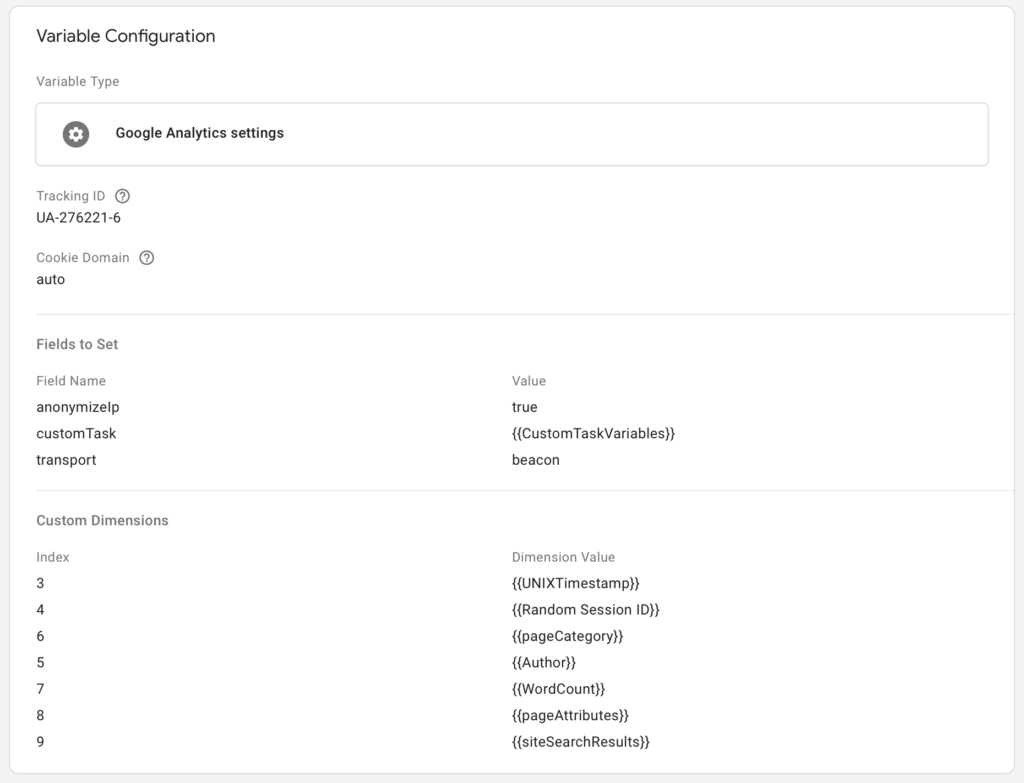
The Scroll Depth Threshold variable is not necessary, it may need to be configured first. This step must then be repeated again for the clicks on a YARPP link and, if applicable, for the custom dimension of the number of words per text. However, these can already be passed in the Google Analytics settings, which are defined as variables. In my case, the configuration looks like this:
As you can see, there are some things special about my configuration, but the WordCount is passed into a custom dimension with an index value of 7.
Creating the calculated metric
In order to display a ratio or conversion rate, a calculated metric is created. These are the columns “YARPP Seen CVR” and “YARPP Click CVR” in the example report in the first screenshot. Note: It may take some time for the custom metrics to be visible here! This means that this step may only be feasible after a few hours or even after a day.
In the Administration screen in the far right column, you will find the entry Calculated measured values. Click on the red button New Calculated Measured Value and then apply the following settings in the following screen. All you have to do is type in the first few letters of the variable name, and Analytics will complete the names. This is the setting for the Click CVR:
For the CVR lakes, the formula {{YARPP seen}} / {{pageviews}} is used.
Create the custom report
Last but not least, a report is now created, as can be seen in the first screenshot above. Under Customization (top left) and Custom Reports, a new report can be created. Here, all currently custom and relevant metrics available from board are selected and the appropriate dimension is selected. Unfortunately, no secondary dimension can be selected here; this must then be done manually when the custom report is invoked.
That’s it! Further valuable knowledge about web analysis can be found in my book “Introduction to Web Analysis”!


